kemangVPN
L2TP VPN Client Setup Tutorial for Mikrotik Routers
Here are the steps to set up a VPN with the L2TP protocol on a Mikrotik router
Connecting to kemangVPN with L2TP on Mikrotik RouterOS
Here are the steps to configure L2TP settings on a MikroTik router running RouterOS.
First, make sure you have a kemangVPN account. If you don't, join by opening an account here →
Preparation
Select Client Area -> Services -> active service
Obtain and note the following information:
- VPN server address that will be used
Settings
Once your kemangVPN account is active, you can use the following credentials to make an L2TP Client connection from your Mikrotik router.
username and password: find them in your email
Log in to your MikroTik router's GUI.
The default router IP address is 192.168.88.1 and the username is admin. Or enter the IP address and/or username you set up yourself
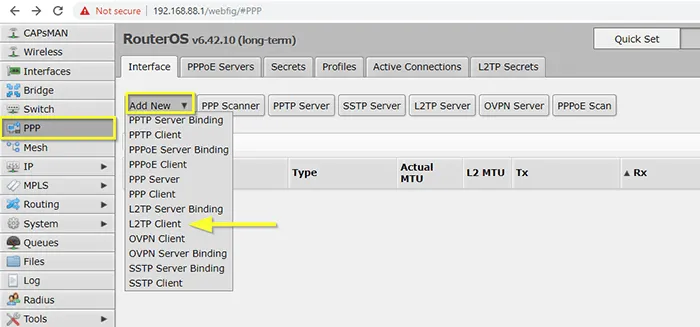
Once logged in, select PPP from the left menu, click the Interface tab, then select Add New and L2TP Client
On the General tab, fill in the name field with: kemangVPN L2TP
In the Dial Out section, enter the address of the kemangVPN server you want to use in the Connect To field (see the Preparation step above)
Enter your username and password
Make sure mschap2 is checked in the Allow section.
Click the Apply button at the top.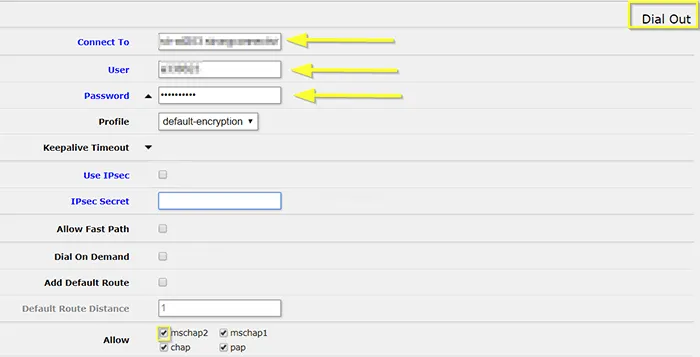
Select IP from the left menu and choose Firewall from the submenu.
Click the NAT tab and click the Add New button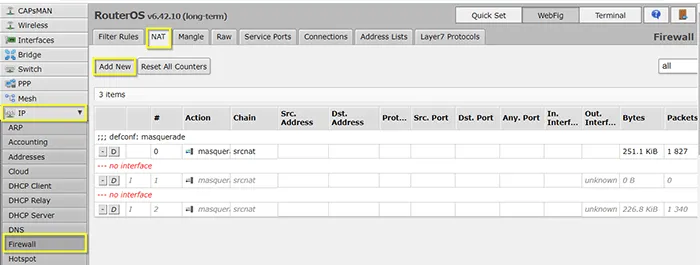
On the General tab, select srcnat in the Chain field.
Select kemangVPN L2TP in the Out. Interface field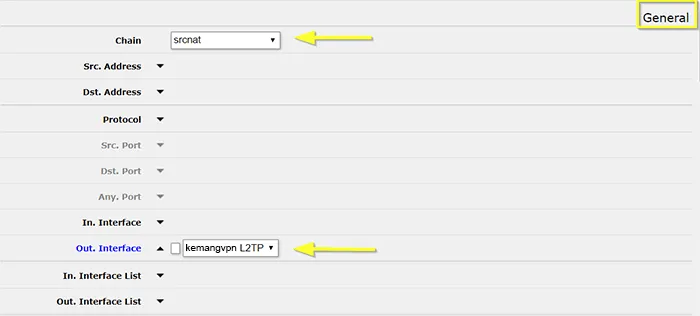
Select Action.
Select masquerade from the dropdown in the Action field and click OK in the top left of the screen
Go back to the Firewall window, select the Mangle tab and click the ***Add New
*** button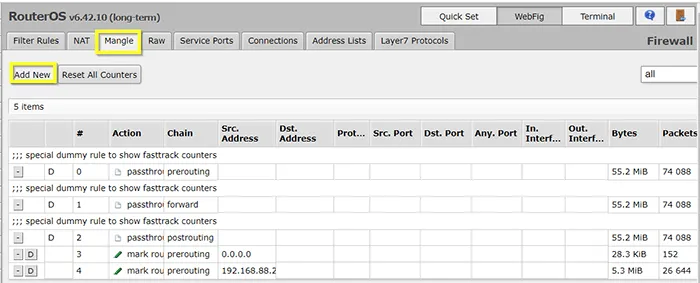
On the General tab, in the Chain field, select prerouting.
In Src. Address, enter the IP or IP range you want to pre-route through the VPN connection.
Open the “Action” tab. Select “mark routing” for “Action”.
Enter a name for “New Routing Mark”, for example “kemangvpn_routing_mark”.
Click “OK”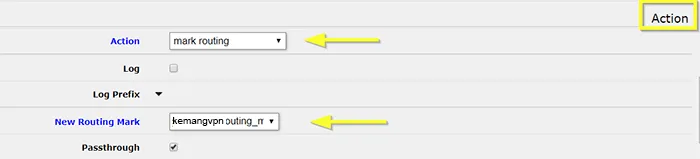
Go to “IP” in the left menu and select “Routes” from the submenu. Click the “Add New” button.
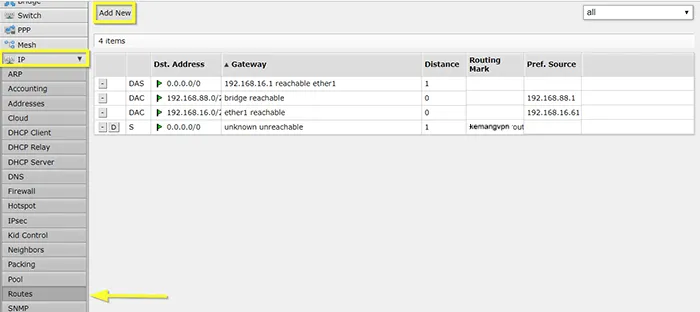
Enter “0.0.0.0/0” for “Dst.Address”. Select “kemangVPN L2TP” (the VPN interface you created in Step 4) for “Gateway”.
For “Routing Mark”, select the routing name you created in Step 11. Click “OK”.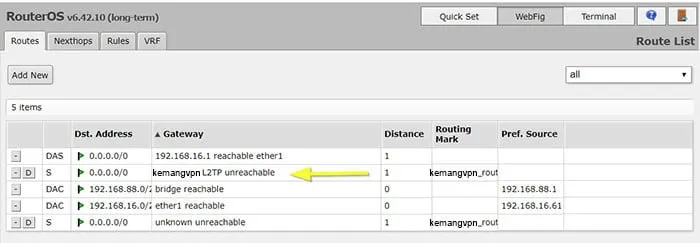
You're now back in the “Routes” window and connected to kemangVPN. When you click the VPN you created, you'll be taken to the “Route” tab, where you can see the active status.
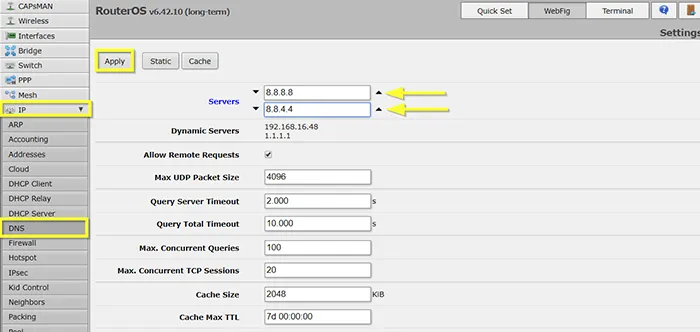
Go to “IP” (left menu) and select “DNS” from the submenu. In the DNS Settings, enter “8.8.8.8” as the first DNS server and “8.8.4.4” as the second. (If you only see one white box in the Servers field, click the down arrow and another white box will appear.) Click the “Apply” button.
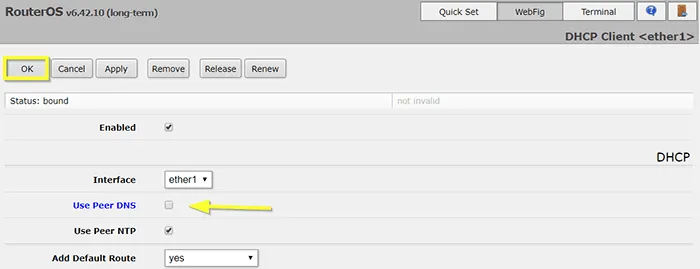
If your MikroTik acts as a DHCP client, make sure the DHCP settings don't overwrite the DNS you entered manually. Open “IP” from the left menu and select “DHCP Client” from the submenu. Double-click your DHCP client entry.
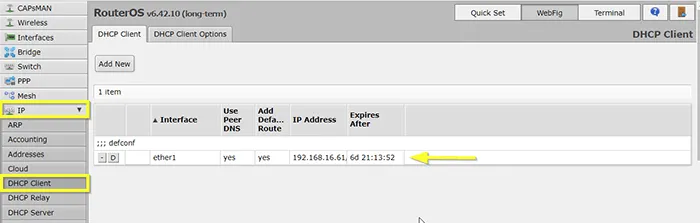
Uncheck the “Use Peer DNS” option on the DHCP tab and click “OK”.