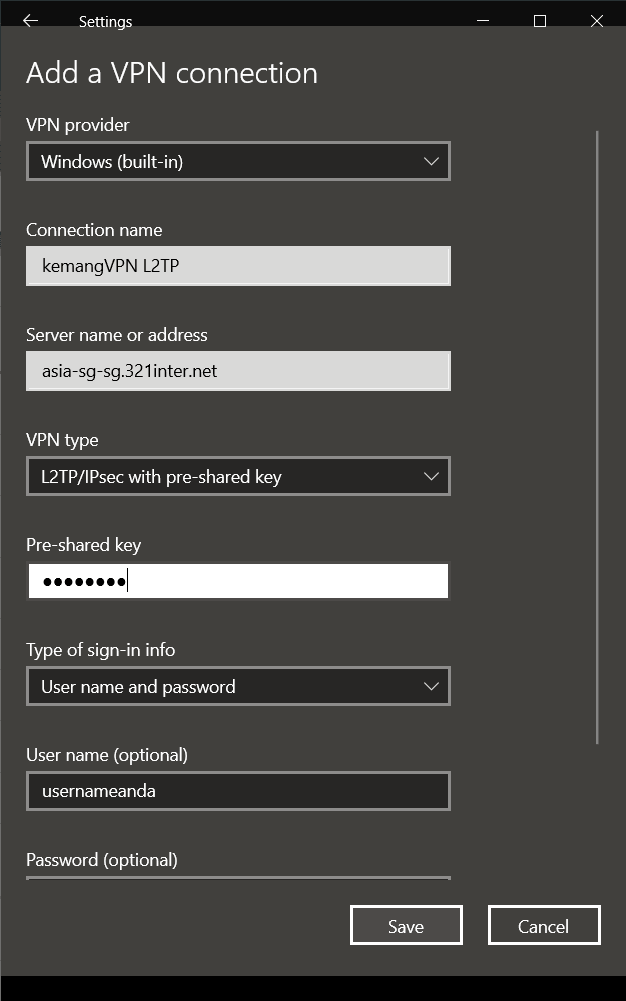
Manual VPN connection setup on Windows devices can be done according to the following steps (this tutorial is for Windows 10).
Open Settings –> Network & Internet –> VPN
Click button + Add a VPN Connection to create new VPN connection
Select VPN Provider: Windows (built-in)
Enter name kemangVPN L2TP (or other name according to the selected server location)
Fill in Server Address with Server address that you want to use (see preparation steps above)
Select Type: L2TP/IPSec with pre-shared key
Enter the IPSec pre-shared key that you obtained in the preparation steps above.
Select Type of sign-in info: User name and password
Fill in User name with your username (see the activation confirmation email, check your spam box if necessary)
Fill in Password with your VPN password (see the activation confirmation email, check your spam box if necessary)
Select Save

Your settings are complete, and to activate the VPN, select the VPN Profile you just created, then press Connect
If the VPN is successfully connected, you will see the VPN symbol in your task bar .
You can then use other applications as usual on your device. For example, opening netflix.com from your browser.